

Let’s be real — gluten-free cakes have a bit of a reputation. Dry. Dense. Kinda disappointing. Sound familiar?
Well, not this one.
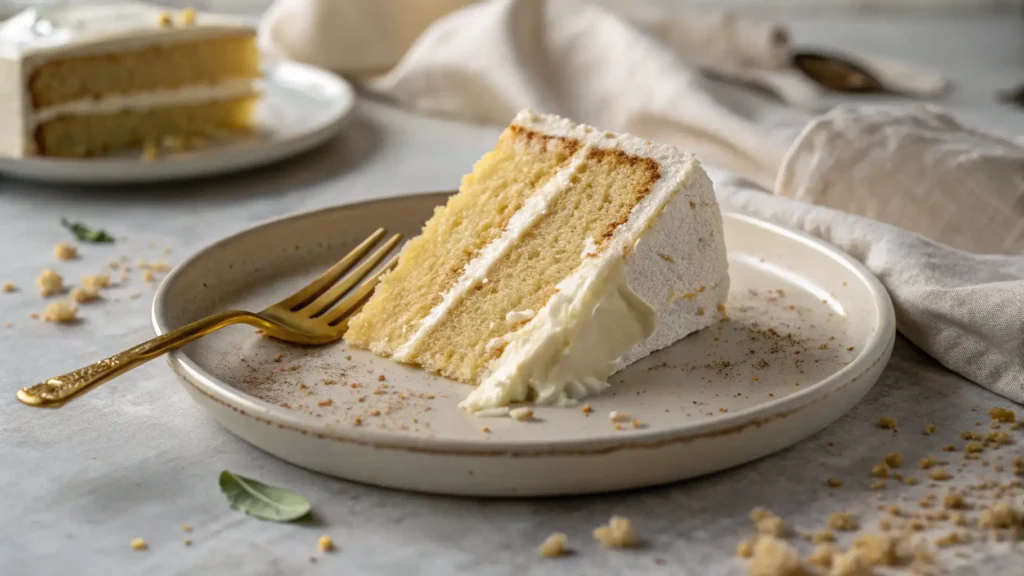
This gluten-free vanilla cake is here to completely rewrite the rules. It’s soft, fluffy, incredibly moist, and packed with that nostalgic vanilla flavor we all crave — without a single trace of gluten. And the best part? You don’t need fancy ingredients or professional baking skills to pull it off.
Whether you’re baking for someone with celiac disease, a gluten sensitivity, or you just want a lighter, gentler cake for your body, this recipe delivers every single time. In this article, you’ll get the full breakdown: from the best gluten-free flour to use, to expert tricks that guarantee a tender crumb — plus a rich, creamy vanilla buttercream that takes it over the top.
Ready to make a gluten-free vanilla cake that actually tastes like real cake? Let’s get into it.
Here’s what you’re getting in this post:
- A fail-proof vanilla cake that holds together like magic.
- A quick rundown of smart gluten-free baking swaps (and why they matter).
- Easy tweaks to make it dairy-free or cupcake-ready.
- Tips for layering, frosting, and even freezing it for later.
📌 TL;DR: Skip the guesswork. This cake delivers every time.
Quick-Facts: Gluten-Free Vanilla Cake at a Glance
- Prep Time: 20 minutes
- Bake Time: 30–35 minutes
- Total Time: ~1 hour (with cooling + frosting)
- Makes 24 cupcakes or two 9-inch circular cakes.
- Skill Level: Beginner-friendly
- Best For: Birthdays, weddings, or “just because” cake cravings
- Can Be Made Dairy-Free? Yes
- Freezer Friendly? Yep — even frosted!
Why This Recipe Works (Even Without Gluten)
You might be wondering: how does a cake stay fluffy without that magical gluten structure?
Here’s the secret sauce:
- A combo of starches: This recipe doesn’t just sub in almond flour and call it a day. It blends rice flour, tapioca starch, and potato starch to mimic gluten’s elasticity without the grit.
- Neutral oil + sour cream: Butter tastes great, but oil keeps the crumb soft and moist for days. Sour cream adds a subtle tang and moisture without overpowering the vanilla.
- High-heat baking start: The initial oven temp gives it a quick lift, setting the structure before it has a chance to sink.
BTW, this recipe isn’t fussy. No weird ingredients, no extra trips to obscure health food stores. Simple steps, professional cake shop results.
What if I want to make it dairy-free?
Easy swap: Use plain dairy-free yogurt or coconut cream in place of sour cream, and neutral plant oil (like avocado or canola). It’s still fluffy, still vanilla-packed, and still gets devoured.
Step-by-Step: How to Make the Best Gluten-Free Vanilla Cake
Before you preheat the oven, breathe easy — this isn’t one of those overly complicated GF recipes. No egg beating acrobatics or obscure binders. Just real ingredients, a few simple tricks, and one fantastic cake.

1. Preheat & Prep Your Pans
- Set your oven to 350°F (175°C).
- Line the bottoms of two 9-inch round cake pans with parchment paper after lightly greasing them. Don’t skip the parchment — it guarantees a clean release.
Human tip: If you’ve ever cried over a broken cake layer, you know pan prep is half the battle.
2. Mix the Dry Ingredients
In a large bowl, whisk together:
- Two cups of xanthan gum-containing gluten-free flour mix
- 2 tbsp cornstarch or tapioca flour
- 1 ½ tsp baking powder
- ½ tsp baking soda
- ½ tsp fine sea salt
This combo gives you that classic “springy” texture most GF cakes totally miss.
3. Blend the Wet Ingredients
In another bowl (or mixer), combine:
- Half a cup of neutral oil, such as canola or avocado
- 1 ½ cups granulated sugar
- ½ cup sour cream (or dairy-free yogurt)
- 4 large eggs (room temp)
- 1 tbsp pure vanilla extract
- 1 cup milk (or unsweetened almond milk)
Mix until smooth — don’t overthink it. It should look like cake batter, not pancake batter.
4. Combine & Pour
- Stir the dry ingredients into the wet mixture until they are well blended
- Pour the batter evenly into your pans and gently tap each pan on the counter to release any air bubbles.
5. Bake & Cool
- Bake for 30–35 minutes, or until the tops spring back lightly and a toothpick comes out clean.
- Let them cool in pans for 10 minutes, then flip out onto wire racks to cool completely.
Avoid rushing the cooling process — frosting a warm cake can lead to a slippery mess. Ask me how I know.
Can I make cupcakes instead?
Yes! Just divide the batter into lined cupcake tins (fill about 2/3 full). Bake for 18 to 22 minutes at the same temperature.
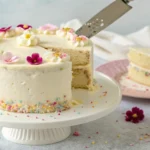
Frosting, Layering & Decorating Tips
Let’s be real — the frosting is half the fun (and sometimes, the main reason people eat cake). So let’s get it right. Whether you’re going for a rustic “naked” look or full-on party glam, this cake’s tender crumb holds up beautifully.
H3: The Go-To Frosting: Vanilla Buttercream
You can’t go wrong with a classic American buttercream:
- 1 cup unsalted butter (softened)
- 4 cups powdered sugar
- 2–3 tbsp milk or cream
- 1 tbsp pure vanilla extract
- Pinch of salt
Beat until fluffy — about 3-5 minutes. For spreadability, add extra milk as necessary.
Want it dairy-free? Sub in plant-based butter and a splash of almond or oat milk. Still dreamy, still pipeable.
Layering Without Crumbsplosion
Here’s the trick to frosting GF cakes (they can be crumbier than wheat ones):
- Use a cake leveler or a serrated knife to level out the layers of your cake.
- To seal in any loose crumbs, apply a thin layer of frosting, called a crumb coat. Chill for 15 minutes.
- Apply a final thick layer and smooth the sides with a spatula or bench scraper.
- Add sprinkles, berries, or edible flowers if you’re feeling extra.
BTW, if you’re short on time (or energy), skip the layering and go single-layer with a swoop of frosting on top. It still looks gorgeous and tastes the same.
What’s the best frosting flavor pairing?
If you’re not into vanilla-on-vanilla, this cake also plays nice with:
- Lemon or citrus frosting (bright and summery)
- Chocolate buttercream (rich and classic)
- Berry frosting, such as strawberry or raspberry, adds a pop of color and a tangy flavor.
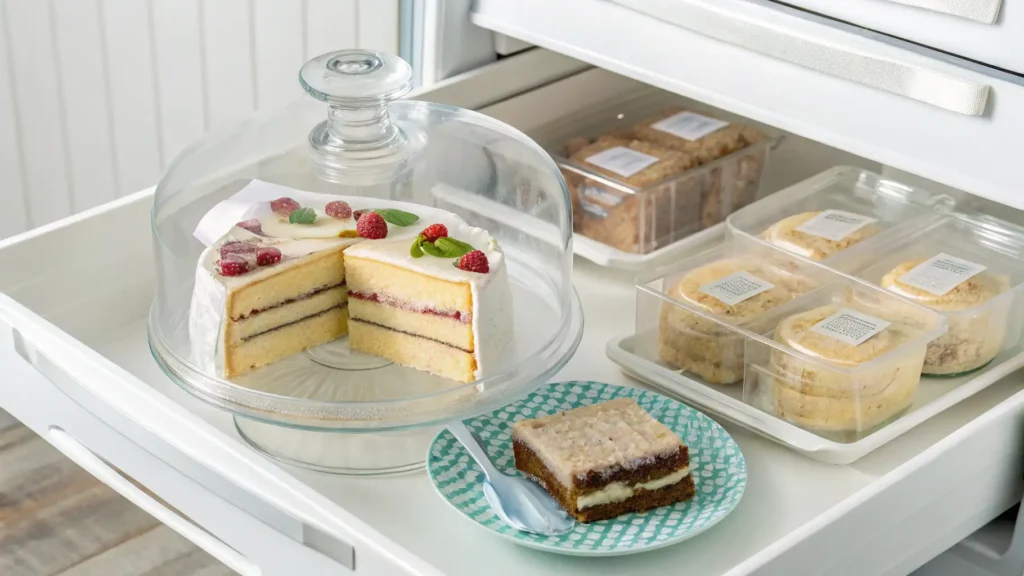
Storage, Freezing & Make-Ahead Tips
We’ve all been there: it’s 11 PM, your kid’s party is tomorrow, and the cake isn’t frosted yet. Deep breath — this recipe was built with real-life chaos in mind.
Short-Term Storage
- Unfrosted cake layers: Wrap tightly in plastic wrap and store at room temp for up to 24 hours.
- Frosted cake: Store covered in the fridge for up to 3 days. Let it sit at room temp for 30–45 minutes before serving so the frosting softens back up.
Quick trick: Use a large overturned mixing bowl as a makeshift cake dome if you don’t have a container tall enough.
Freezing Instructions
Yes, this cake freezes like a champ — both frosted and unfrosted.
- To freeze layers: Let cool completely. Tightly wrap each layer in plastic, followed by foil. Freeze for up to 3 months.
- To freeze frosted cake: Freeze uncovered for 1–2 hours until the frosting is firm. After that, wrap and keep for up to two months. Thaw in the fridge overnight.
Planning ahead? You can bake, cool, and freeze the layers up to a week before your event — then frost fresh the day of.
Can I make the batter ahead of time?
Not ideal. Gluten-free batter can lose structure if it sits too long before baking. But you can mix your dry ingredients in advance and store them in a jar — think of it like your own custom cake mix.
Conclution
If you’ve made it this far, you’re probably not just looking for a gluten-free vanilla cake — you’re hoping for the one. The kind of cake that makes even your most gluten-loving guests ask for seconds… without the pity-face.
This recipe isn’t just about ingredients — it’s about reclaiming the joy of baking when you’re working with restrictions. It’s about creating something that feels like home, tastes like celebration, and reminds you that gluten-free doesn’t mean flavor-free.
So go on — preheat the oven, trust the process, and give it a try. And when someone asks where you bought that amazing cake? Just smile.
If you try it, I’d love to hear how it turned out! Leave a comment below, share a photo on Instagram, or pin it for your next party.
FAQ
Let’s tackle those sneaky “what ifs” that always pop up when baking gluten-free.
Why is my gluten-free cake crumbly?
Two common culprits:
- Not enough binding agent — make sure your GF flour blend includes xanthan gum or guar gum.
- Overbaking — even 5 extra minutes can dry it out. Trust your toothpick test.
Can I use almond flour or coconut flour?
Not as a 1:1 swap. Those flours behave totally differently — almond adds density, coconut sucks up moisture like a sponge. Stick to a tested GF all-purpose blend for best results.
How do I make this more moist?
- Use full-fat sour cream (or dairy-free equivalent) — avoid low-fat.
- Don’t overmix.
- Add a tablespoon of honey or maple syrup for extra moisture retention.
Can I bake this in a 9×13 pan?
Absolutely! It works great. Just extend the bake time to 35–40 minutes, and don’t fill the pan more than 2/3 full.
What’s the best brand of gluten-free flour for this?
Personal favorites:
- King Arthur Measure for Measure
- Cup4Cup (if you don’t mind dairy)
- Bob’s Red Mill 1-to-1 Baking Flour
These blends give the best rise and structure without grit or gumminess.
Gluten-Free Vanilla Cake That’s Actually Moist
Equipment
- 2 9-inch round cake pans lined with parchment paper
- 1 Mixing bowl (large)
- 1 Hand or stand mixer
- 1 Spatula
- 1 Oven preheated to 350°F
Ingredients
Dry Ingredients:
- 2 cups gluten-free flour blend with xanthan gum
- 2 tbsp tapioca flour or cornstarch
- 1 ½ tsp baking powder
- ½ tsp baking soda
- ½ tsp sea salt
Wet Ingredients:
- ¾ cup neutral oil canola or avocado
- 1 ½ cups granulated sugar
- ½ cup sour cream or dairy-free yogurt
- 4 large eggs room temp
- 1 tbsp pure vanilla extract
- 1 cup milk or almond milk
Instructions
- Preheat the oven to 350°F (175°C). Grease two 9-inch round pans and line bottoms with parchment.
- In a large bowl, whisk together all dry ingredients.
- In another bowl, mix oil, sugar, sour cream, eggs, vanilla, and milk until smooth.
- Combine wet and dry ingredients, stirring gently until just mixed.
- Pour into pans, tap gently to release bubbles.
- Bake for 30–35 minutes or until a toothpick comes out clean.
- Let cool in pans for 10 minutes, then transfer to a wire rack to cool completely before frosting.
Notes
- You can use dairy-free yogurt and almond milk to make this recipe fully dairy-free.
- For cupcakes: Bake 18–22 minutes at same temp.
- Cake layers freeze well — wrap tightly and freeze up to 3 months.