
Seared ahi tuna is a culinary masterpiece that’s surprisingly easy to make at home. With a perfectly crispy outer layer and a tender, medium-rare center, this dish brings restaurant-quality flavor to your kitchen in just minutes. Whether you’re a seafood lover or looking for a healthy, high-protein meal, mastering the art of pan-searing ahi tuna will elevate your cooking game.
But how do you achieve that perfect sear while keeping the inside buttery and melt-in-your-mouth delicious? In this guide, we’ll cover everything you need to know—from choosing the best sushi-grade tuna to expert tips for achieving the ultimate sear. Plus, we’ll explore flavorful marinades, sesame-crusted variations, and the best side dishes to complement your ahi tuna steak.
Let’s dive in and learn how to make the best seared ahi tuna recipe at home—it’s quicker and easier than you think!
What is Ahi Tuna and Why is It Best for a Seared Ahi Tuna Recipe?
Ahi Tuna Overview: What Makes It Different from Other Tuna Varieties?
Ahi tuna, also known as yellowfin tuna (Thunnus albacares) or sometimes bigeye tuna (Thunnus obesus), is a high-quality, lean fish commonly used in sushi, poke bowls, and gourmet seafood dishes. Unlike canned tuna, ahi tuna is prized for its firm texture, mild flavor, and vibrant pink-to-deep-red color, making it ideal for raw or lightly seared preparations.
What sets ahi tuna apart from other tuna varieties?
- Superior Quality & Freshness – Ahi tuna is often sold as sushi-grade, meaning it’s safe to consume raw or lightly cooked. This distinguishes it from skipjack tuna (commonly used in canned tuna) and albacore tuna, which have a flakier texture and milder taste.
- Lean Yet Flavorful – Unlike bluefin tuna, which is rich in fat and has a buttery texture, ahi tuna is leaner yet still tender, making it perfect for quick-searing while retaining juiciness.
- Versatile for Cooking – Ahi tuna adapts well to various flavor profiles and cooking methods, from sesame-crusted pan-seared tuna to soy-ginger marinated steaks. Its firm texture allows it to hold up well on the grill, stovetop, or even in tartares and ceviches.
- Nutrient-Rich & Healthy – Ahi tuna is an excellent source of lean protein, omega-3 fatty acids, and essential vitamins like B12 and niacin. It’s also low in saturated fat, making it a heart-healthy seafood choice.
Since ahi tuna is best enjoyed with a slightly raw center, searing it at high heat for just 30–60 seconds per side creates a delicious contrast between the crispy outer crust and the tender, rare interior. This method locks in moisture, enhances flavor, and preserves its delicate texture—which is why seared ahi tuna is the gold standard for preparing this exquisite fish.
Sushi-Grade Tuna: Why It’s Crucial for Safe Raw Consumption
When preparing seared ahi tuna, using sushi-grade tuna is essential for both flavor and safety. But what does “sushi-grade” really mean, and why does it matter?
What Is Sushi-Grade Tuna?
“Sushi-grade” isn’t an official FDA certification, but rather a term used by fishmongers to indicate that the tuna has been handled and frozen properly to reduce the risk of parasites. High-quality tuna meant for raw consumption must be:
- Frozen at ultra-low temperatures (-20°F or lower) for a specific period to kill potential parasites.
- Handled under strict hygienic conditions to prevent bacterial contamination.
- Sourced from reputable suppliers that specialize in high-end seafood.
Why It’s Important for Seared Ahi Tuna
Since seared ahi tuna is only briefly cooked on the outside, the inside remains nearly raw. Using sushi-grade tuna ensures:
- Safety – Proper freezing eliminates parasites, making it safe to eat.
- Quality & Freshness – Sushi-grade tuna is fresher, has a vibrant color, and a clean, ocean-like taste.
- Best Texture – Unlike regular tuna, which may have a mushy or grainy consistency, sushi-grade ahi tuna maintains its firm, buttery texture, ideal for searing.
When buying ahi tuna, look for deep red, glossy steaks with no fishy smell and ensure it’s labeled as sushi-grade or sashimi-grade from a trusted fishmonger.
Seared vs. Fully Cooked: Benefits of a Lightly Seared Ahi Tuna Steak
While some people might be tempted to fully cook their ahi tuna, this actually diminishes its unique texture and flavor. Here’s why a quick sear is the best way to prepare ahi tuna:
1. Retains a Tender, Buttery Texture
Ahi tuna is naturally lean, meaning it can dry out quickly if overcooked. A quick sear on high heat caramelizes the outside while keeping the inside soft and succulent, creating a perfect contrast between crispy and tender.
2. Enhances the Natural Flavor
Seared ahi tuna has a delicate, umami-rich flavor that is slightly sweet and nutty, especially when paired with sesame crusts or soy-based marinades. Overcooking results in a bland, dry texture similar to canned tuna.
3. Locks in Juiciness & Nutrients
By searing the exterior quickly, you seal in moisture while keeping the essential omega-3 fatty acids and protein intact. Fully cooking it removes much of the natural oils and flavor.
4. Achieves a Restaurant-Quality Finish
High-end restaurants serve ahi tuna medium-rare to rare, creating a gourmet experience that’s simple to replicate at home. With the right technique, you can achieve that beautiful pink center with a golden crust, just like a pro chef.
For the best results, sear ahi tuna over high heat for just 30–60 seconds per side, then slice it against the grain for perfect presentation.
Ingredients You’ll Need for the Best Seared Ahi Tuna Recipe
To create a perfectly seared ahi tuna steak, you’ll need a handful of high-quality ingredients that enhance its natural flavor while adding depth and texture. Here’s what you’ll need:
Main Ingredients
- Ahi Tuna Steaks (Sushi-Grade) – The star of the dish! Look for fresh, sushi-grade ahi tuna steaks, about 1 to 1.5 inches thick, with a deep red color and firm texture. This ensures the best flavor and safety when served rare.
- Sesame Seeds (White & Black Mix) – Adding a crunchy, nutty crust, sesame seeds not only enhance texture but also complement the rich umami taste of the tuna. A mix of white and black sesame seeds gives the best visual contrast.
- Soy Sauce – A key ingredient for seasoning and marinating. Opt for low-sodium soy sauce to avoid overpowering the natural taste of the tuna while still adding a savory depth.
- Sesame Oil – This toasted, aromatic oil enhances the nutty flavors and helps achieve the perfect crispy sear when combined with a high-smoke-point oil like avocado or vegetable oil.
- Ginger (Fresh or Ground) – Freshly grated ginger provides a bright, slightly spicy kick, balancing the richness of the fish. It’s also great for digestion!
- Garlic (Minced or Powdered) – Adds a subtle earthy and aromatic depth to the marinade and crust, enhancing the umami notes of the tuna.
- Black Pepper (Freshly Cracked) – Ahi tuna pairs beautifully with coarse black pepper, which adds a slight heat and enhances the natural flavor of the fish without overwhelming it.

Optional Additions for Extra Flavor
While the main ingredients provide a delicious base, these optional additions can elevate your seared ahi tuna with extra flavor, texture, and presentation:
- Wasabi – A small dab of wasabi adds a spicy, sinus-clearing heat that enhances the natural richness of ahi tuna. Pair it with soy sauce for an authentic Japanese touch.
- Lemon or Lime – A squeeze of fresh citrus brightens the dish, adding a zesty freshness that cuts through the umami flavors. You can also use lemon zest for extra aroma.
- Avocado – Creamy avocado pairs perfectly with seared ahi tuna, providing a buttery contrast to the crispy sesame crust. Serve it sliced or mashed into a simple guacamole.
- Seaweed Salad – A classic Japanese side dish that complements ahi tuna with its umami-rich, slightly sweet, and tangy flavors. It adds color, texture, and extra nutrition to your plate.
Best Places to Buy Ahi Tuna
Since quality is crucial when making seared ahi tuna, knowing where to buy sushi-grade tuna is essential. Here are the best sources:
- Fresh Seafood Markets – Local seafood markets often carry high-quality, sushi-grade ahi tuna. Look for tuna that’s deep red, firm, and free from strong fishy odors.
- Reputable Grocery Stores – Some high-end grocery stores like Whole Foods, Trader Joe’s, or specialty organic markets carry fresh or frozen sushi-grade ahi tuna. Always check labeling and ask the seafood department for details.
- Online Seafood Suppliers – Trusted online vendors like Wild Alaskan Company, Fulton Fish Market, or Vital Choice ship flash-frozen sushi-grade ahi tuna directly to your door, ensuring top-tier freshness.
- Japanese or Asian Markets – Stores specializing in Japanese cuisine often have a dedicated sashimi section with premium ahi tuna steaks perfect for searing.
Pro Tip: Always look for “sushi-grade” or “sashimi-grade” labeling, and if in doubt, ask your fishmonger about freezing practices to ensure safety for raw consumption.
Step-by-Step Guide to Making the Best Seared Ahi Tuna Recipe
Achieving a perfectly seared ahi tuna steak requires just a few simple steps, but each one is crucial for maximizing flavor, texture, and presentation. Follow this guide to ensure your tuna is crispy on the outside while remaining tender and buttery inside.
Step 1: Prepare the Tuna
1. Choose High-Quality Ahi Tuna
- Select sushi-grade ahi tuna steaks that are about 1 to 1.5 inches thick.
- Look for deep red, firm, and moist tuna with no fishy smell.
2. Pat the Tuna Dry
- Use paper towels to remove any excess moisture. A dry surface ensures better seasoning adhesion and a perfect sear.
3. Season the Tuna
- Lightly season both sides with:
✅ Salt – Enhances natural flavors.
✅ Black Pepper – Adds mild heat.
✅ Marinade (Optional for Extra Flavor):- 2 tbsp soy sauce (for umami depth)
- 1 tsp sesame oil (for nutty richness)
- 1 tsp grated fresh ginger (for warmth and spice)
- If marinating, let the tuna rest for 5–10 minutes at room temperature
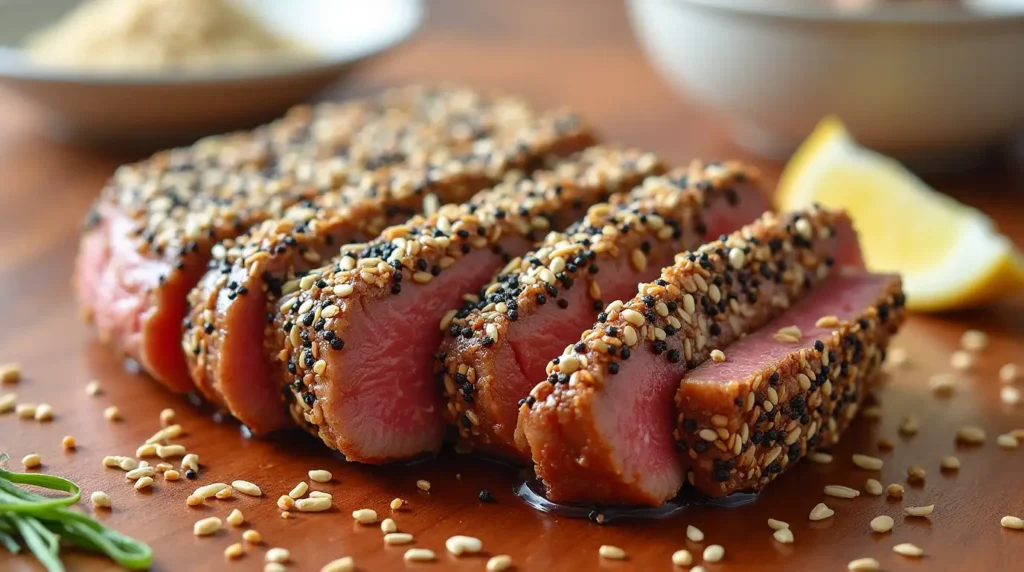
Step 2: Coat with Sesame Seeds (Optional for Sesame-Crusted Ahi Tuna)
Adding a sesame crust is an optional but highly recommended step that elevates the texture and flavor of your seared ahi tuna. The sesame seeds create a crunchy, nutty exterior that perfectly contrasts the tender, medium-rare interior of the tuna steak. Here’s how to do it:
1. Prepare the Sesame Seeds
- Use a mix of white and black sesame seeds for a visually striking crust.
- You’ll need about 2–3 tbsp of sesame seeds for each tuna steak. You can use toasted sesame seeds for a richer flavor, or untoasted seeds for a milder taste.
2. Coat the Tuna Steaks
- Press the tuna steaks into the sesame seeds on both sides, ensuring the seeds stick evenly.
- Gently press down to help the seeds adhere to the surface. You can also sprinkle the seeds over the top and press with your hands, but ensure a generous coating for optimal texture.
3. Optional: Let the Coated Tuna Rest
- Allow the coated tuna to rest for a few minutes to ensure the sesame seeds adhere firmly before searing. This step ensures the seeds don’t fall off while cooking and creates a uniform crust.
This step is optional, but it truly adds a delightful crunch and a deeper nutty flavor to your seared ahi tuna.
Step 3: Sear the Tuna
Achieving the perfect sear on your ahi tuna is key to locking in the flavor and maintaining a tender, rare center. The process is quick, so it’s essential to act fast to avoid overcooking. Here’s how to get that crispy crust and juicy interior:
1. Preheat the Pan
- Use a nonstick skillet or cast iron skillet for the best searing results.
- Heat the pan over high heat for about 2–3 minutes. The goal is to have the pan extremely hot before adding the tuna, which helps create the perfect sear and prevents sticking.
- Lightly coat the pan with high-heat cooking oil like avocado oil, vegetable oil, or grapeseed oil—something with a high smoke point.
2. Sear the Tuna
- Place the tuna steaks in the pan, laying them away from you to avoid any hot oil splatter.
- Sear for 30–60 seconds on the first side. The exact timing will depend on your preference for sear depth, but you want the outside to be golden brown and crispy.
- Flip the tuna and sear the other side for 30–60 seconds. The tuna should still be rare to medium-rare inside. You’ll know it’s ready when the exterior is well-browned, but the center remains soft and pink.
3. Don’t Overcook!
- Ahi tuna cooks quickly, and overcooking will result in a dry, tough texture. The goal is to create a seared outer crust while maintaining a moist, tender center.
- If you prefer your tuna a little more cooked, you can extend the sear to 1 minute per side, but be cautious not to go beyond medium.
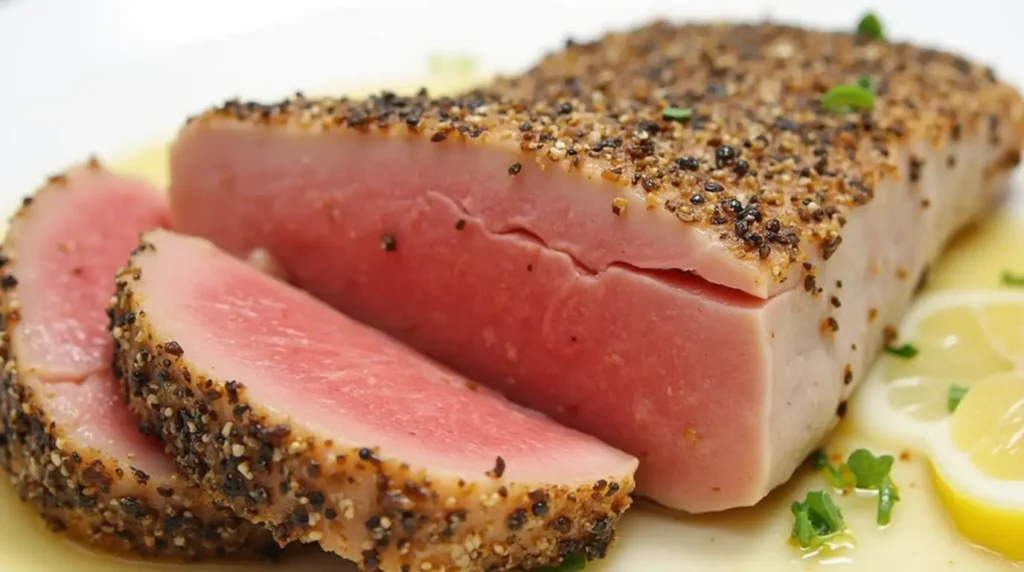
Step 4: Slice and Serve
Now that your ahi tuna steaks are perfectly seared, it’s time to slice and serve them to highlight their delicate texture and beautiful presentation. Here’s how to get the perfect slices:
1. Let the Tuna Rest (Optional)
- After searing, let the tuna steaks rest for 2-3 minutes. This allows the juices to redistribute inside the fish, making it more tender when you cut into it. This step is optional, as tuna doesn’t need to rest as long as other meats, but it can help improve the texture.
2. Slice Against the Grain
- Position the tuna steak with the grain running horizontally (from left to right). Cutting against the grain helps to make the tuna more tender and prevents the texture from being tough.
- Use a sharp knife (preferably a chef’s knife or sashimi knife) to slice thin pieces of tuna, about 1/4 inch thick.
- Ensure each slice is even and clean to highlight the beautiful pink center of the fish.
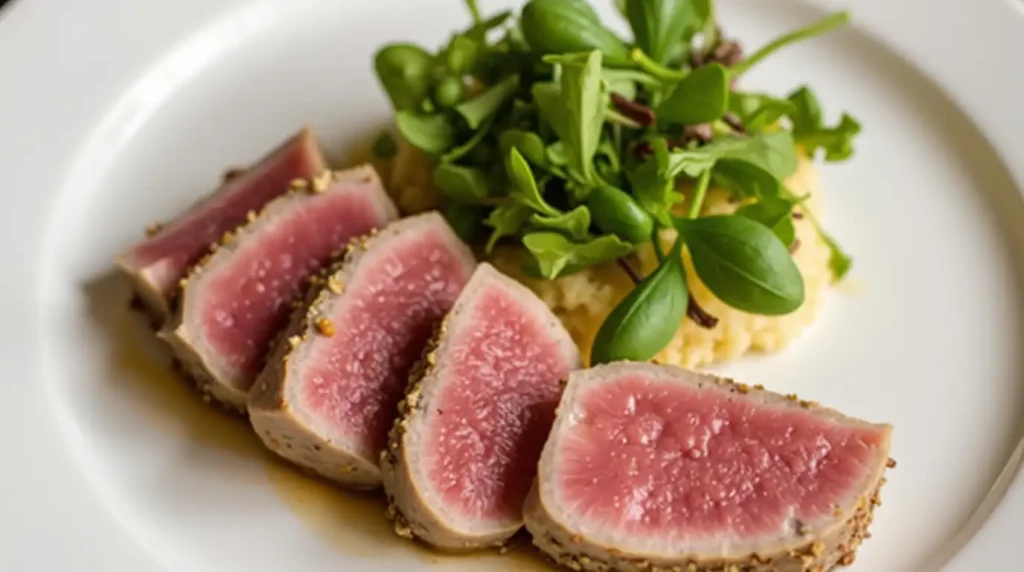
3. Plate the Tuna
- Arrange the slices on a plate in an aesthetically pleasing way. You can fan the slices out slightly for a beautiful presentation.
- Optionally, drizzle a little soy sauce or sesame oil on top, or serve with a side of wasabi and pickled ginger.
- Garnish with sesame seeds, fresh herbs, or even a small avocado slice for added flavor and texture.
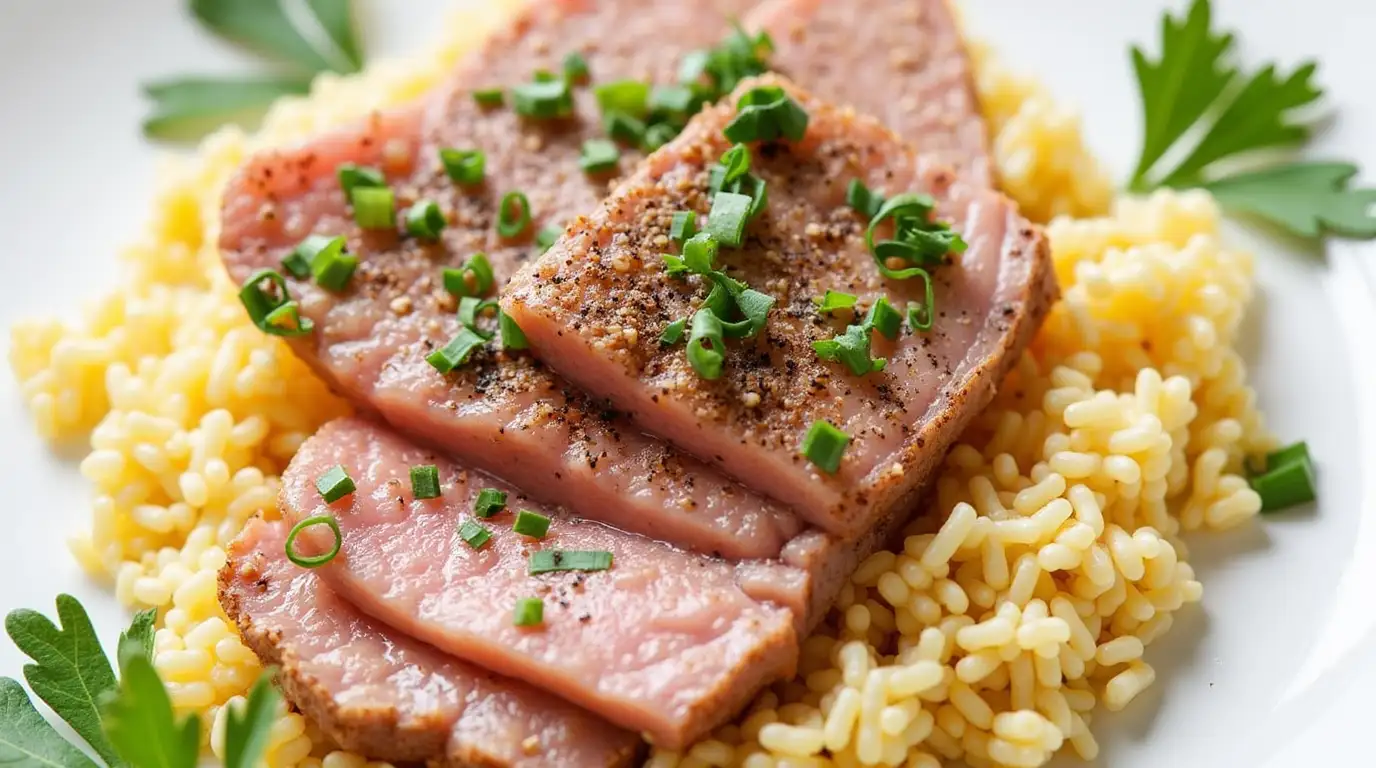
Serving Suggestions
- Serve the seared ahi tuna with a side of seaweed salad, steamed rice, or crispy vegetables for a full meal.
- For a lighter option, serve over a fresh salad with mixed greens, cucumber, and a simple soy-ginger dressing.
Best Side Dishes and Sauces for Your Seared Ahi Tuna Recipe
Seared ahi tuna is a delicate and flavorful main dish, so pairing it with the right sides and sauces can truly elevate your meal. Here are some fantastic side dish options and sauces & dips to complement your tuna:
Sauces & Dips for Seared Ahi Tuna
The right sauce or dip can enhance the natural flavors of your seared ahi tuna, adding a balance of tang, spice, and umami. Here are a few popular choices:
1. Soy-Ginger Sauce
- A soy-ginger sauce adds umami depth and a subtle kick of heat.
- To make: Combine soy sauce, freshly grated ginger, a splash of rice vinegar, and a pinch of brown sugar. Stir until well-mixed and serve on the side or drizzle over the tuna.
2. Ponzu Sauce
- Ponzu is a citrusy soy-based sauce, offering a refreshing contrast to the rich tuna. It combines soy sauce, citrus juice (usually lime or lemon), and a hint of vinegar.
- Serve it as a dipping sauce for a tart and tangy kick that brightens the fish’s natural flavor.
3. Wasabi Mayo
- A rich wasabi mayo adds creaminess with a spicy, tangy kick from the wasabi.
- To make: Mix mayonnaise with a small amount of wasabi paste (or powdered wasabi) and a squeeze of lemon juice. It’s the perfect balance of creamy and spicy.
Best Side Dishes for Seared Ahi Tuna
The right side dishes can help complement and balance the lightness and richness of seared ahi tuna. Here are some great side options to serve alongside your dish:
1. Seaweed Salad
- A seaweed salad is a classic side for Japanese-inspired tuna dishes. The umami-rich, slightly sweet, and tangy flavor pairs perfectly with the tuna’s mild taste. Plus, the crunchy texture contrasts nicely with the tuna’s tender consistency.
2. Avocado Salad or Sliced Avocado
- Creamy avocado complements the tuna with its rich, buttery texture. Serve it sliced alongside the tuna, or toss it in a simple avocado salad with cucumber, tomato, and a citrus dressing for a refreshing contrast.
3. Steamed or Grilled Vegetables
- Pair the tuna with steamed or grilled vegetables like asparagus, bok choy, or baby carrots for a light, healthy accompaniment. The charred flavors from the grill or the natural sweetness of the vegetables add balance to the dish.
4. Jasmine Rice or Sushi Rice
- A simple side of jasmine rice or sushi rice makes a perfect base for the tuna, absorbing the soy-based sauces and providing a neutral, slightly sticky texture that complements the fish.
5. Cucumber Salad
- A light, tangy cucumber salad with rice vinegar and a bit of sugar adds crisp freshness to your meal. The cool crunch of cucumbers balances the rich flavors of the seared tuna.
Serving Suggestions
- Plating: Arrange your seared ahi tuna slices fanned out on a plate and garnish with extra sesame seeds, fresh cilantro, or thinly sliced scallions for added color.
- Rice & Sides: Serve the tuna over sushi rice, with a side of seaweed salad, and top with a small dish of soy-ginger sauce for dipping.
Wine Pairing Suggestions
- For a white wine, try a crisp Sauvignon Blanc or Chardonnay to complement the light and delicate flavors of the tuna.
- If you prefer red, go for a light Pinot Noir that won’t overpower the fish.
Side Dishes for Seared Ahi Tuna
To complete your seared ahi tuna dish, pair it with fresh, flavorful sides that complement the richness of the tuna while adding contrast in both texture and taste. Here are a few excellent side dish options:
1. Steamed Rice
- Simple and versatile, steamed rice (preferably sushi rice or jasmine rice) serves as a neutral base that soaks up any extra sauce and enhances the tuna’s flavors.
- Serve it in a small bowl or mound it on the side for a beautiful presentation. You can also sprinkle a little sesame seed on top for an extra layer of flavor and texture.
2. Seaweed Salad
- A seaweed salad adds a wonderful, umami-rich contrast to the tuna. The slightly tangy, vinegar-based dressing pairs beautifully with the crunchy texture of the seaweed.
- Serve it in a small dish alongside the tuna or gently toss it over the tuna for added texture and flavor. A garnish of sesame seeds or chopped cilantro adds visual appeal.
3. Sautéed Vegetables
- Sautéed vegetables, such as asparagus, bok choy, baby carrots, or broccoli, bring a burst of color and a fresh, slightly sweet flavor that balances the richness of the tuna.
- For an elegant touch, sauté them in sesame oil with a dash of soy sauce and garlic for added flavor.
- Arrange the sautéed veggies in a diagonal line next to the tuna for a stylish presentation.
Plating Ideas: How to Create a Restaurant-Style Presentation
Plating is crucial when serving seared ahi tuna, as it helps elevate the dish into a restaurant-quality experience. Here’s how to present your tuna in a visually appealing and professional way:
1. Use a Wide, White Plate
- Opt for a simple, wide white plate as the base. White plates allow the vibrant colors of the tuna, garnishes, and sides to pop and look more appealing.
2. Arrange the Tuna Slices
- Fan the tuna slices neatly in the center or slightly off-center of the plate to create a visually striking presentation.
- Angle the slices to follow a diagonal line for a more dynamic look, or neatly stack them in a slightly overlapping pattern for a more classic arrangement.
3. Add Color and Texture with Sides
- Place the sides (steamed rice, sautéed vegetables, seaweed salad) artistically on the plate, ensuring there is balance between the tuna and sides.
- For a minimalist style, serve the rice in a small round or square bowl placed beside the tuna. Alternatively, you can make a small mound of rice directly on the plate to complement the tuna.
- Sautéed vegetables should be arranged in a neat pile or line, making sure they don’t overwhelm the tuna. Place the seaweed salad in a small dish or top it lightly over the tuna for a more elegant touch.
4. Garnish Thoughtfully
- Garnish with a light sprinkle of sesame seeds, fresh herbs like cilantro or chives, and a few scallion slices for freshness and color.
- Lemon wedges, a few thin slices of cucumber, or even edible flowers can add extra flair and contrast to the plate.
5. Drizzle Sauces Artistically
- Use a drizzle of your chosen sauce, such as soy-ginger sauce or ponzu, to frame the tuna in a thin line or artistic swirl around the plate.
- Be mindful not to overdo it—less is more. A small dish of soy-ginger sauce on the side for dipping can also add a polished touch.
Pro Tip for a Restaurant-Style Finish
- Wipe the edges of the plate with a clean cloth to remove any smudges or spills before serving. This adds a professional touch to the overall presentation.
By paying attention to the arrangement and garnishes, you can transform your seared ahi tuna into a restaurant-quality dish that’s both delicious and visually stunning.
Tips for Cooking the Perfect Seared Ahi Tuna Recipe Every Time
Achieving a perfectly seared ahi tuna requires attention to detail, and choosing the right equipment is one of the most important factors. Here are some key tips to ensure your seared tuna turns out flawless every time:
Choosing the Right Pan: Why a Cast Iron or Nonstick Skillet Works Best
The pan you use plays a pivotal role in achieving a beautiful sear on your ahi tuna. Both cast iron skillets and nonstick pans are excellent choices, but here’s why they work so well:
1. Cast Iron Skillet
- Heat Retention: Cast iron skillets are known for their superb heat retention and even heat distribution, making them ideal for achieving a consistent sear on your tuna.
- High Heat: A well-seasoned cast iron skillet can handle high temperatures without warping, which is key to getting that crispy exterior while maintaining a rare center.
- Natural Nonstick Surface: Over time, cast iron develops a natural nonstick surface, which reduces the chances of your tuna sticking to the pan, especially if you’ve preheated the skillet properly.
2. Nonstick Skillet
- Ease of Use: Nonstick pans are easier to clean and provide a more forgiving cooking experience, especially for beginners.
- Quick Release: Tuna is naturally lean, so it has a tendency to stick to the pan. A good-quality nonstick skillet helps ensure that the tuna releases easily, making the searing process smoother.
- Even Cooking: While nonstick pans don’t retain heat as well as cast iron, many high-quality nonstick skillets still offer even heat distribution, ensuring your tuna is seared evenly.
Additional Pan Tips
- Preheat your pan: Whether using cast iron or nonstick, make sure the pan is well-preheated on medium-high heat. This ensures a quick, crispy sear without overcooking the tuna.
- Oil: Use a high smoke point oil, such as avocado oil or grapeseed oil, to prevent the oil from burning and imparting a bitter taste. Add the oil only after the pan is preheated.
Choosing the right pan and following these tips will help you achieve that perfect, restaurant-quality sear on your ahi tuna every time!
Achieving the Perfect Sear: High Heat, Minimal Cooking Time
To achieve a perfect sear on your ahi tuna, the process must be quick and precise. Here’s how to master the searing technique:
1. High Heat is Crucial
- Preheat your pan (whether cast iron or nonstick) over medium-high to high heat. The goal is to get the pan very hot before placing the tuna inside.
- The high heat ensures that the exterior crisps up quickly without overcooking the interior, allowing for that signature medium-rare center that melts in your mouth.
2. Minimal Cooking Time
- Sear each side of the tuna for 30-60 seconds, depending on your desired level of doneness. You’re aiming for a golden brown crust on the outside while keeping the inside rare to medium-rare.
- The key is not to overcook the tuna. Ahi tuna is best when the center remains moist and tender, with a slightly pink center. Overcooking can make the texture dry and tough.
Storage & Leftovers: How to Store and Enjoy Seared Ahi Tuna Later
While seared ahi tuna is best enjoyed fresh, you can store leftovers for later enjoyment. Here’s how to store and reheat your tuna to maintain its quality:
1. Storing Seared Ahi Tuna
- Cool Quickly: If you have leftover tuna, make sure to cool it quickly. Let it rest at room temperature for no more than 2 hours to prevent bacterial growth.
- Wrap Properly: Once cooled, wrap the leftover tuna in plastic wrap or place it in an airtight container. For best results, store it in the fridge within an hour of cooking.
- Storage Duration: Leftover seared ahi tuna can be stored in the refrigerator for 1-2 days. Beyond this point, the texture and flavor may deteriorate.
2. Reheating Seared Ahi Tuna
- Gently Reheat: Ahi tuna is delicate, so you should avoid reheating it over high heat. To reheat gently, place the tuna in a preheated oven at 250°F (120°C) for about 10-12 minutes, or until warmed through.
- Alternatively, you can sauté the tuna quickly in a pan over low heat to warm it up without overcooking.
- Avoid Microwaving: Reheating tuna in the microwave can result in rubbery and dry tuna, so it’s best to skip this method.
3. Using Leftovers
- If you don’t plan on eating the leftover tuna as is, you can use it in salads, sushi rolls, or poke bowls. Simply slice it thinly and add it as a topping for your salad or bowl for a delicious next-day meal.
By following these steps, you can ensure that your seared ahi tuna remains tender, flavorful, and safe to eat even after storing it for later
Conclusion:
Making seared ahi tuna at home is easier than you might think! With just a few simple ingredients, the right techniques, and some careful attention, you can create a flavor-packed, healthy dish that rivals anything you’d find at a restaurant. Here are the key takeaways:
- High heat and minimal cooking time are essential for achieving that perfect crispy exterior and tender, rare center.
- Choose a cast iron or nonstick skillet to ensure an even, effective sear.
- Add flavorful sauces and simple sides like seaweed salad or steamed rice to complement the tuna.
- You can store and enjoy leftovers, but make sure to reheat gently to preserve the texture and taste.
I encourage you to give this recipe a try the next time you’re craving something light yet flavorful. It’s a quick, healthy option that anyone can master.
Call to Action
Have you tried this seared ahi tuna recipe? I’d love to hear about your experience! Leave a comment below to share your thoughts, tips, or any variations you tried. If you enjoyed this recipe, don’t forget to share it on social media and spread the love. And if you’re hungry for more, check out similar delicious recipes that will take your culinary skills to the next level!
Happy cooking!
Frequently Asked Questions (FAQs) About Seared Ahi Tuna Recipe
1. What is the best type of tuna for a seared ahi tuna recipe?
The best tuna for a seared ahi tuna recipe is sushi-grade yellowfin (ahi) or bluefin tuna. Sushi-grade ensures it’s safe to eat rare and provides the best flavor and texture.
2. How long should I sear ahi tuna on each side?
For a perfect seared ahi tuna recipe, cook each side for 30-60 seconds over high heat. This creates a crispy crust while keeping the inside rare and tender.
3. Do I need to marinate ahi tuna before searing?
Marinating is optional but recommended! A short marinade (10-15 minutes) using soy sauce, sesame oil, and ginger enhances flavor while keeping the tuna juicy.
4. What’s the best pan to use for searing ahi tuna?
A cast iron skillet or nonstick pan is best for a seared ahi tuna recipe because it retains high heat and ensures an even, golden crust.
5. How do I know if my ahi tuna is sushi-grade?
Look for labels like “sushi-grade” or “sashimi-grade” from a reputable seafood market or online supplier. It should be deep red, fresh-smelling, and firm.
6. Can I use frozen ahi tuna for a seared ahi tuna recipe?
Yes! Just thaw it properly in the refrigerator overnight. Pat it dry before cooking to remove excess moisture for the best sear.
7. What’s the best way to serve seared ahi tuna?
Pair seared ahi tuna with steamed rice, seaweed salad, wasabi, ponzu sauce, or sautéed vegetables for a delicious, restaurant-quality meal.
8. How do I store leftover seared ahi tuna?
Store leftovers in an airtight container in the refrigerator for up to 24 hours. Enjoy it cold in salads or poke bowls—avoid reheating to maintain texture.