

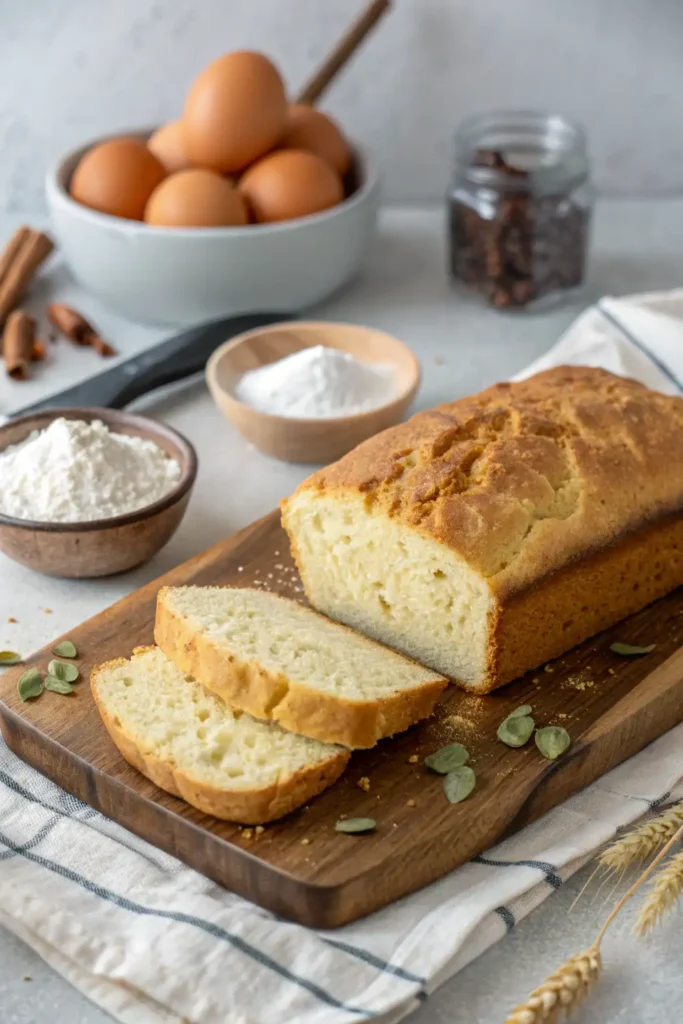
Let’s be honest: making gluten-free bread can be tough. It often turns out dry or tastes bad. But this loaf is different.
It comes out soft, slices well, and stays together in the toaster. You can make it with common pantry items. No special flours or long kneading needed. It’s a bread that makes you excited for lunch.
We made this recipe after trying many others that failed. We wanted something reliable and tasty. It works for everyone, whether you’re avoiding dairy, eggs, or just don’t like expensive store bread. We even tested it with different flours and in a bread machine.
This guide will show you how to make perfect gluten-free bread. You’ll learn about yeast, substitutions, and tips for success. It doesn’t matter if you’re new to gluten-free or have tried many times before. You’ll end up with a bread that’s worth serving.
Key Benefits of This Gluten-Free Bread Recipe
This bread truly changes the game for gluten-free options. It’s not just a claim; it’s a reality. Thousands of home bakers keep coming back for more.
1. Texture That Actually Feels Like Bread
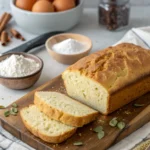
No crumbling or gummy centers here. The crumb is soft yet sturdy, perfect for sandwiches. It even has a slight springiness like wheat loaves. You can toast it, pack it, or freeze it, and it stays great.
2. Pantry-Friendly Ingredients
You won’t need to search for rare ingredients. This recipe uses common 1-to-1 gluten-free flour blends. Plus, it doesn’t rely on eggs or dairy.
3. Bread-Machine Compatible
Want an easy way to make bread? This recipe works well with most bread machines. No need for a second mixing bowl or hand shaping. Just set it and let it do its thing.
4. Vegan & Allergy-Friendly Options
Looking for egg-free or xanthan gum-free options? We’ve got you covered. The result is a loaf that’s inclusive and delicious.
5. Adaptable to Your Life
This bread is perfect for any time of day. Slice it thin or thick, freeze it, or enjoy it warm with jam. It’s just like “real” bread.
What Makes This Recipe Stand Out?
How is this gluten-free loaf better than store-bought or other recipes?
A: Store-bought gluten-free bread is often dry, expensive, and full of preservatives. This recipe lets you control the ingredients. The result is fresh-tasting bread that’s affordable and meets your dietary needs.
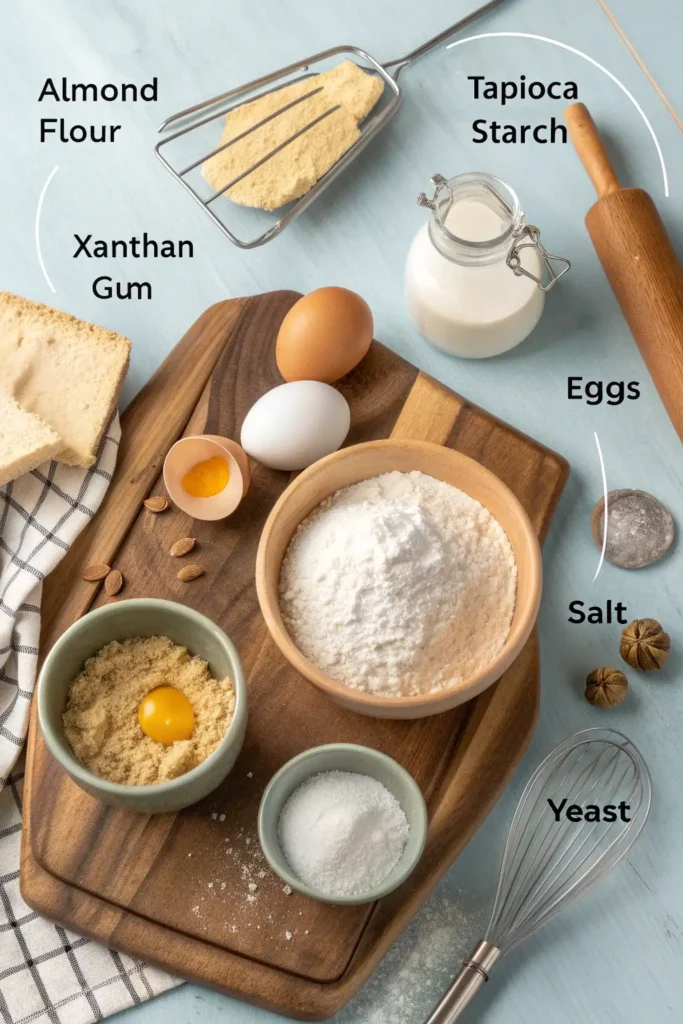
Essential Ingredients for Gluten-Free Bread
This recipe is easy to follow. No need for complicated mixes or tricky ratios. Each ingredient has a specific role. We’ll tell you why it’s important, so you can make smart swaps if needed.
What You’ll Need
Gluten-Free All-Purpose Flour (2 cups)
Choose a 1:1 blend with xanthan gum unless you’re using it separately. King Arthu🧂 Essential Ingredients for Gluten-Free Bread
This recipe is easy to follow. No need for complicated mixes or tricky ratios. Each ingredient has a specific role. We’ll tell you why it’s important, so you can make smart swaps if needed.
What You’ll Need
- Gluten-Free All-Purpose Flour (2 cups)
Choose a 1:1 blend with xanthan gum unless you’re using it separately. King Arthur, Cup4Cup, or Bob’s Red Mill 1-to-1 are good options.
Tip: Avoid single-flour mixes like just rice or almond flour — your loaf won’t bind properly. - Instant Yeast (1 tablespoon)
This ingredient makes the bread rise. You don’t need to proof it separately. But, blooming it in warm water checks if it’s alive. - Sugar or Honey (2 tablespoons)
It feeds the yeast and adds sweetness. You can cut down on this, but it’s good for flavor and browning. - Salt (1 teaspoon)
It enhances flavor and keeps yeast in check. Don’t skip it. - Warm Water (1 ½ cups at ~100°F)
The water should be warm, not hot. Think of it as bathwater temperature. Cold water slows yeast, and hot water kills it. - Eggs (2 large)
Eggs bind and enrich the dough. Use egg replacers or flax eggs if you need to. - Oil (¼ cup)
It keeps the loaf moist and soft. Avocado or light olive oil are good choices, but any neutral oil works. - Apple Cider Vinegar (1 teaspoon)
It helps the bread rise better and adds a tangy flavor. - Xanthan Gum (optional — 1 teaspoon)
Add it if your flour blend doesn’t include it. It adds elasticity and structure.
Can I Swap Ingredients?
Q: What if I don’t have xanthan gum or can’t eat eggs?
A: Skip xanthan gum if your blend has it, or use psyllium husk or guar gum in small amounts. For egg-free, use flax eggs or commercial replacers like Bob’s Red Mill Egg Replacer. Results might vary, but it will bake well.
Step-by-Step Instructions: How to Make Gluten-Free Bread
Want a soft, golden gluten-free loaf every time? No bread machine needed. Just a bowl, a pan, and your oven.
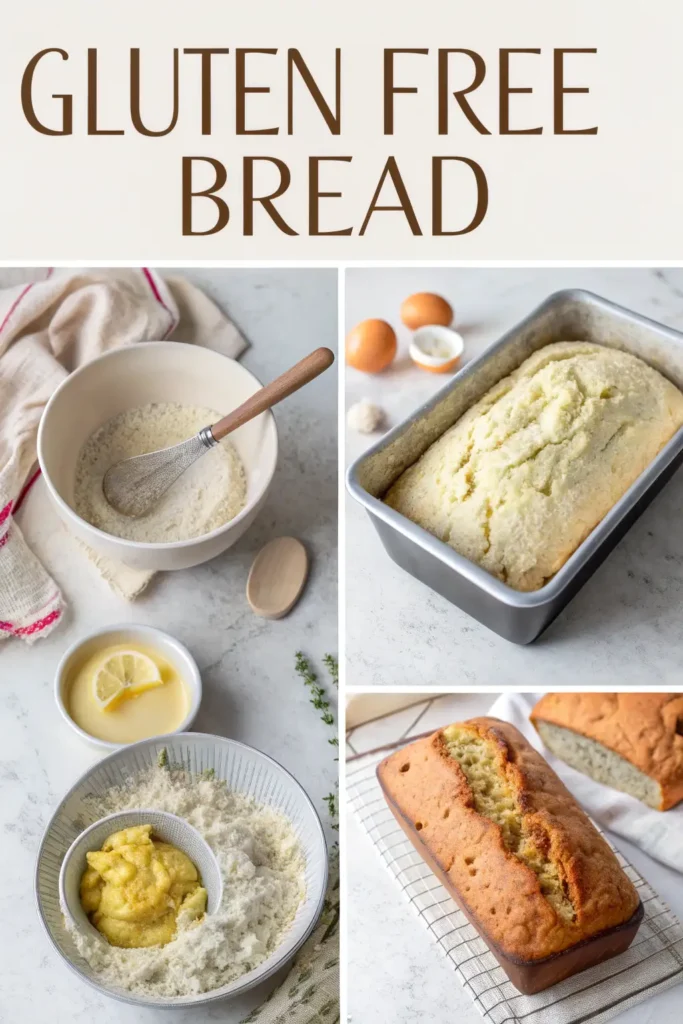
Mix, Rise, Bake — It’s That Simple
1. Bloom the Yeast (5 minutes)
Mix warm water, sugar, and instant yeast in a large bowl. Stir gently. Wait for it to foam to check if the yeast is active.
If it doesn’t foam after 10 minutes, toss it and start with fresh yeast.
2. Add Wet Ingredients
Whisk in eggs, oil, and vinegar until smooth. The mix should look frothy.
3. Stir in Dry Ingredients
Add flour, salt, and xanthan gum (if needed) slowly. Mix until it’s thick and sticky, like cake batter.
4. Transfer to Loaf Pan
Put the dough in a greased 9×5-inch loaf pan. Smooth the top with oiled hands or a spatula. Add seeds or oats for crunch.
5. Let It Rise (30–45 minutes)
Cover with plastic wrap or a damp towel. Let it rise in a warm, draft-free spot until it’s just above the pan.
Too much rise? It may collapse later. Watch closely after 30 minutes.
6. Bake (35–40 minutes at 375°F)
Preheat oven while the dough rises. Bake in the center rack until the top is golden and sounds hollow. The internal temp should be ~205°F.
7. Cool Completely
Remove from pan and cool on a wire rack. Cutting too early makes it gummy.
Can I Use a Bread Machine Instead?
How do I make this loaf in a bread machine?
A: Put wet ingredients in the machine first, then dry ingredients. Use the “gluten-free” or “basic white” cycle. Skip kneading if you can. No need to shape or second-rise. Remove the paddle before the final bake for better results.
Troubleshooting & Smart Substitutions
Even with the right recipe, gluten-free bread can be unpredictable. Don’t worry — here’s how to troubleshoot common issues and tweak the loaf to fit your needs.
Common Bread Issues (and Fixes)
- “My loaf sank in the middle!”
That usually means it over-proofed or the oven wasn’t fully preheated. Try shortening the rise next time and checking your oven with a thermometer. - “It’s gummy inside.”
Gluten-free bread must cool fully before slicing. Also check your flour blend — too much starch can trap moisture. - “It didn’t rise much.”
Check your yeast (was it fresh and foamy?) and water temp (should be 95–110°F). Also make sure you didn’t skip the sugar — it feeds the yeast! - “It’s too dry the next day.”
Wrap it tightly once cool and store at room temp. You can also freeze slices and toast them straight from the freezer.
Ingredient Swaps & Allergy Tweaks
- No Eggs?
Use 2 flax eggs (2 tbsp ground flax + 5 tbsp water). Let sit 5 mins before mixing in. - No Xanthan Gum?
Use 1 tablespoon psyllium husk powder or 1.5 tsp guar gum. The texture will shift slightly, but it will hold well. - No Vinegar?
Try lemon juice or omit if needed. It just helps the yeast react a bit faster. - Bread Machine Notes
Many readers use Zojirushi, Hamilton Beach, and Cuisinart machines with this recipe. Set to “gluten-free” or “basic white” if available.
Quick FAQ
Can I double this recipe for two loaves?
A: Technically yes, but gluten-free bread performs best when baked in single loaves. If doubling, split the dough into two separate pans and bake simultaneously — don’t try one big loaf.
Storage, Freezing & Best Ways to Serve
You’ve baked a gorgeous loaf — now let’s make sure it stays that way. Here’s how to keep your bread fresh and how to actually enjoy it beyond that first slice.
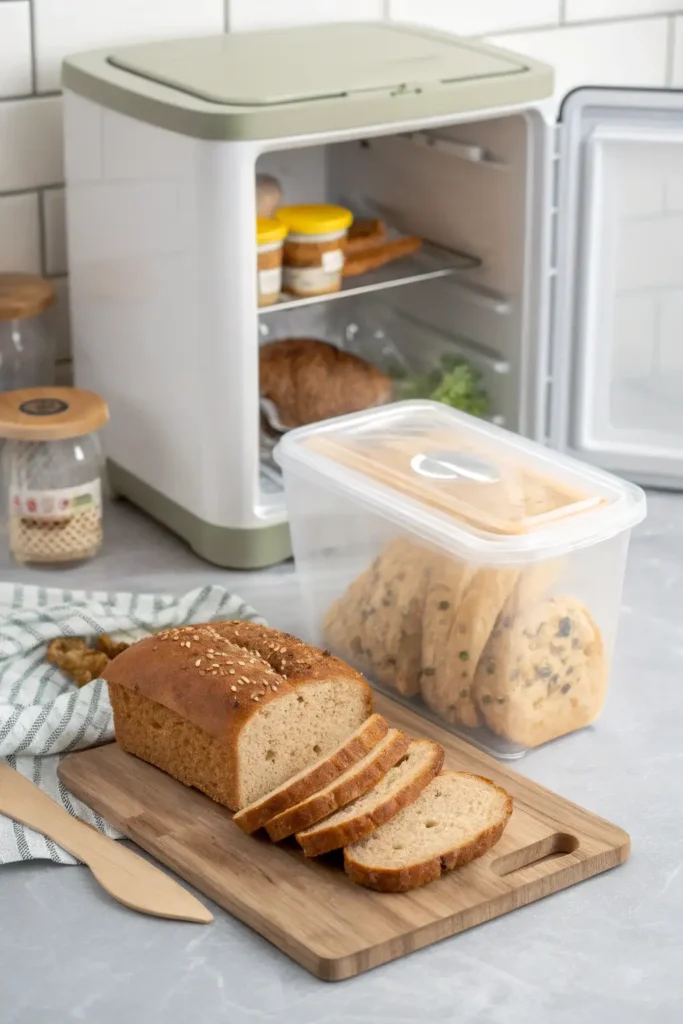
How to Store It Right
- Room Temp:
Once fully cooled, wrap the loaf tightly in plastic wrap or store in an airtight bread box. It’ll stay soft for 2–3 days on the counter. - Fridge? Not ideal.
Gluten-free bread dries out quickly in the fridge. Only refrigerate if your kitchen is very warm or humid. - Freezing Instructions:
Slice the cooled loaf and place parchment between slices. Store in a zip bag or freezer-safe container for up to 2 months.
To reheat: Toast straight from frozen or warm in a low oven.
Serving Suggestions
- Breakfast Toast:
Top with nut butter, jam, or mashed avocado. This bread holds up to toppings. - Sandwiches:
Perfect for grilled cheese, turkey and mustard, or veggie-packed hummus sandwiches. - Croutons or Breadcrumbs:
If your loaf starts drying out, cube and bake for croutons — or blitz into breadcrumbs for coating chicken or topping pasta. - French Toast:
Yep, it holds egg batter well. A little cinnamon, and you’re golden.
FAQ — Can I Bake Then Freeze?
Should I freeze the loaf whole or sliced?
A: Always slice before freezing. It makes it easier to pull out what you need and helps preserve texture. Whole loaves tend to trap more moisture and may go soggy when defrosted.
Conclution
If you’ve made it this far, here’s what matters most: this isn’t just a “good for gluten-free” bread. It’s good bread. Period.
It toasts without crumbling. It slices without a fight. And it makes sandwiches that feel like the kind you grew up on — even if your pantry now looks a little different.
You don’t need fancy equipment, rare ingredients, or five different flours. Just one bowl, one pan, and a little patience. Whether you’re new to gluten-free baking or you’ve been burned (and overbaked) before, this loaf is designed to work with you — not against you.
Try it once. Tweak it to make it yours. And if you snap a photo? Tag it #MyGFLoaf — we’d love to see how it turned out.
FAQ
How should I store gluten-free bread to keep it fresh?
Keep your cooled gluten-free bread in an airtight container at room temperature for up to 2 days. You can also refrigerate it for up to 4 days. Always wrap it tightly in plastic or parchment paper to prevent drying out.
Can you freeze gluten-free bread?
Yes, freezing is the best way to keep its texture. Slice the loaf first, then store in a freezer-safe bag. It’ll stay fresh for 1–2 months.
What’s the best way to reheat frozen gluten-free bread?
Toast it straight from frozen for a quick crisp finish. Or thaw at room temp and warm in a toaster oven or skillet. Avoid microwaving, as it can make it gummy.
How do I serve gluten-free bread so it doesn’t feel dry?
Serve it warm — lightly toasted or pan-grilled with butter or oil. Pair it with moist toppings like smashed avocado, nut butters, or hummus. This balances the texture.
Does gluten-free bread go stale faster than regular bread?
Yes, gluten-free loaves lack the elasticity of gluten, so they dry out quicker. That’s why proper wrapping, refrigeration, or freezing is essential if you’re not eating it within 24–48 hours.
Easy Gluten-Free Bread Recipe
Ingredients
- 2 cups gluten-free all-purpose flour with or without xanthan gum
- 1 tbsp instant yeast
- 2 tbsp sugar or honey
- 1 tsp salt
- 1½ cups warm water 95–110°F
- 2 large eggs or flax eggs for vegan
- ¼ cup oil avocado or neutral
- 1 tsp apple cider vinegar
- 1 tsp xanthan gum if flour blend doesn’t contain it
Instructions
Bloom the Yeast
- In a large bowl, combine warm water, sugar, and yeast. Let it sit 5–10 minutes until foamy.
Mix Wet Ingredients
- Add eggs, oil, and vinegar to the yeast mixture. Whisk gently.
Add Dry Ingredients
- Gradually mix in flour, salt, and xanthan gum (if needed). Stir until a thick batter forms.
Transfer & Smooth
- Scoop batter into a greased 9×5-inch loaf pan. Smooth the top with a wet spatula.
Let It Rise
- Cover loosely and let it rise in a warm spot for 30–45 minutes until slightly above pan rim.
Bake
- Bake at 375°F for 35–40 minutes until golden. Tap the crust — it should sound hollow.
Cool Completely
- Remove from pan, cool on a wire rack. Do not slice while warm.
Notes
- Calories: 150
- Carbs: 24g
- Protein: 3g
- Fat: 5g
- Fiber: 2g
- Store at room temperature for 2–3 days, or slice and freeze for up to 2 months.
- For egg-free: replace eggs with flax eggs (2 tbsp flax + 5 tbsp water).
- Bread machine: Add ingredients in machine order and select “gluten-free” setting.